The core power source of industrial fans is the deceleration motor assembly, which undertakes the responsibility of converting electrical energy into mechanical energy and driving the rotation of giant fan blades. When the motor produces abnormal noise, the overheating protection trips frequently, the speed drops significantly, or the insulation resistance does not meet the standard, it is often necessary to consider replacing the motor.
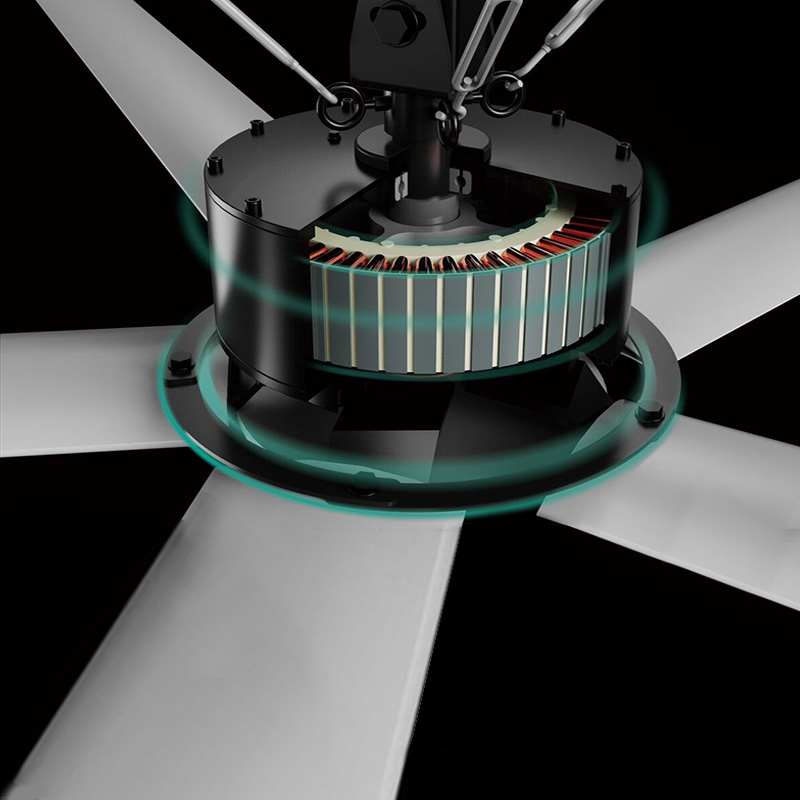
Unlike ordinary fan motor replacement, the motor replacement of industrial large fans is a professional operation with high technical barriers, high safety risks, and tight process connections, and is not simply a matter of "dismantling the old and replacing the new". Below is a detailed breakdown of the entire replacement process for you.
1、 Judgment and preparation before replacement (the "foreplay" that determines success or failure)
Don't rush to remove the screws. Whether the preparation work is sufficient directly determines whether the replacement process is smooth.
Fault diagnosis: First, use a multimeter and megohmmeter to measure the resistance of the motor's three-phase winding and the insulation resistance to ground. If the winding is burned out (due to unbalanced resistance or short circuit to ground) or the bearing is locked (unable to move the rotor manually), it can be confirmed that replacement is needed. Sometimes only bearings or capacitors need to be replaced to avoid excessive maintenance.
Model matching verification: This is a crucial step. The new motor must be completely identical to the original motor, including: installation hole spacing (base size), shaft diameter size (directly affecting the assembly of the fan blade hub), power (KW), speed (rpm), voltage (380V/220V), installation method (vertical/horizontal), and reduction ratio. Even a difference of 1 millimeter in shaft diameter can cause the wheel hub to not fit in or run out.
Special tool inventory: Large tonnage torque wrenches, hexagonal wrench sets, wheel pullers (pullers), hydraulic lifting platforms or articulated carts, and lifting belts must be prepared. It is strictly prohibited to use ordinary wrenches for rough operation.
Safety protection implementation: Set up a warning line below the construction area and clear the site for unrelated personnel. High altitude workers must wear double hook safety belts and ensure a secure hanging point.
2、 On site dismantling stage (careful and cautious "separation technique")
This is a test of the master's patience and experience, as the large fan runs outdoors or in dusty environments for a long time, and the screws are prone to rusting and biting.
Power off hanging: Cut off the independent power supply of the fan at the distribution cabinet, hang a warning sign that reads "Operation is in progress, no switching on", and use an electric pen to verify the power supply.
Dismantling the fan blade assembly: First, use a lift truck to support the fan blades (to prevent them from falling and injuring people during disassembly), and then loosen the connecting bolts between the root of the fan blades and the wheel hub one by one. Attention: These bolts are all high-strength bolts (such as grade 10.9), and should be marked after removal. They must be used when reinstalling the new motor in its original position and cannot be mixed.
Dismantling the wheel hub: The wheel hub and motor output shaft are usually fitted with taper or keyway, which can easily lock up after long-term operation. At this point, use the lead screw of the wheel puller to support the center hole at the shaft end, and apply even force to pull the wheel hub out of the shaft. It is strictly prohibited to directly strike the shaft end or wheel hub edge with a large hammer, otherwise it may damage the motor bearings or cause deformation of the shaft end.
Separate the motor base: Loosen the four fixing bolts between the motor base and the mounting bracket, wrap the old motor with a lifting strap, and slowly place it on the ground. At this time, the weight of the old motor is usually between 80-150 kilograms, and it needs to land smoothly.
3、 Installation stage of new motor (the "highlight" of precision docking)
Installing a new motor is not as simple as disassembling it in reverse, it emphasizes "sequence" and "force".
Cleaning and inspection: Use fine sandpaper to polish the rust and burrs on the motor shaft end, and clean the contact surface of the installation base. Check if the flat key inside the keyway of the new motor shaft end is intact and not loose.
Lifting positioning: Lift the new motor to the installation position, do not lock the base bolts first, only tighten a few buttons by hand, leaving room for adjustment.
Wheel hub heating assembly (key difficulty): If hot fitting technology (interference fit) is used, an electromagnetic induction heater is needed to uniformly heat the inner hole of the wheel hub to 80-100 ℃ to expand it. Then quickly align the shaft end and push it in (based on the principle of thermal expansion and contraction), and after cooling, the hub will tightly lock onto the shaft. If it is cold fitting (cone sleeve type), it is necessary to evenly tighten the top thread on the cone sleeve in diagonal order and press the wheel hub into the shaft end.
Fan blade reset: Install the fan blade back into the hub according to the previously marked position. At this point, a torque wrench must be used to tighten diagonally in three stages (initial tightening, re tightening, and final tightening) according to the manufacturer's specified torque value (such as 200N · m). This step directly determines whether the fan shakes during operation.
Electrical wiring: Connect the motor power cord to the terminal block, paying attention to the phase sequence (U, V, W). If reversed, the fan will reverse (although a large fan can reverse, there is a default direction at the factory). Connect the ground wire and wrap it with insulation tape.
4、 Debugging and dynamic balance verification (the "touchstone" for testing craftsmanship)
Installing a new motor does not mean completion, smooth operation is the goal.
Jogging test drive: Press the start button, release it immediately, and observe whether the fan direction is correct and whether there is any abnormal friction sound.
Low speed running in: Set a low frequency of 5Hz on the frequency converter and let the fan run slowly for 10 minutes to fully lubricate the new motor bearings and adapt to the load.
Speed up dynamic balance detection: gradually increase the frequency to the rated value (such as 50Hz), and use a vibration analyzer to stick it to the motor housing to detect the vibration speed value (mm/s). If the vibration value exceeds the national standard limit (usually ≤ 2.8mm/s), it indicates that the center of gravity of the fan blade is offset. At this time, it is necessary to install a counterweight at the root of the light side blade, and add it while measuring until the vibration value meets the standard.
Current detection: Use a clamp ammeter to clamp the three-phase power cord and read the operating current. The difference in three-phase current should not exceed 5% of the average value, otherwise it indicates that there is a risk of inter turn short circuit in the winding or an unbalanced power supply voltage.
5、 Precautions after replacement
Screw tightening: After 24 hours of operation of the new motor, all connecting bolts will experience stress relaxation due to thermal expansion and contraction. Personnel must be arranged to climb onto the platform again and use a torque wrench to re tighten all bolts, especially the fan blade fixing bolts and base fixing bolts.
Record archiving: Record the brand, model, serial number, and installation date of the new motor, and include them in the equipment ledger for future maintenance and tracking.
Old parts disposal: If the winding of the removed old motor is burned out, it can be sent to a professional motor repair shop for rewinding as a spare part to reduce the cost of the next repair.
Summary
The replacement of industrial fan motors is a process that requires both technical expertise and physical exertion. It requires knowledge of structural mechanics (calculation of lifting center of gravity), precision assembly techniques (hot installation and torque control), and electrical debugging experience (phase sequence and dynamic balancing). It is not recommended for non professionals to operate on their own, and it is necessary to entrust it to a professional team with special equipment installation, modification, and repair qualifications. A standardized and precise motor replacement can not only give the equipment a new lease on life, but also provide you with continuous and stable coolness for the next 5-8 years.


